
Blooming
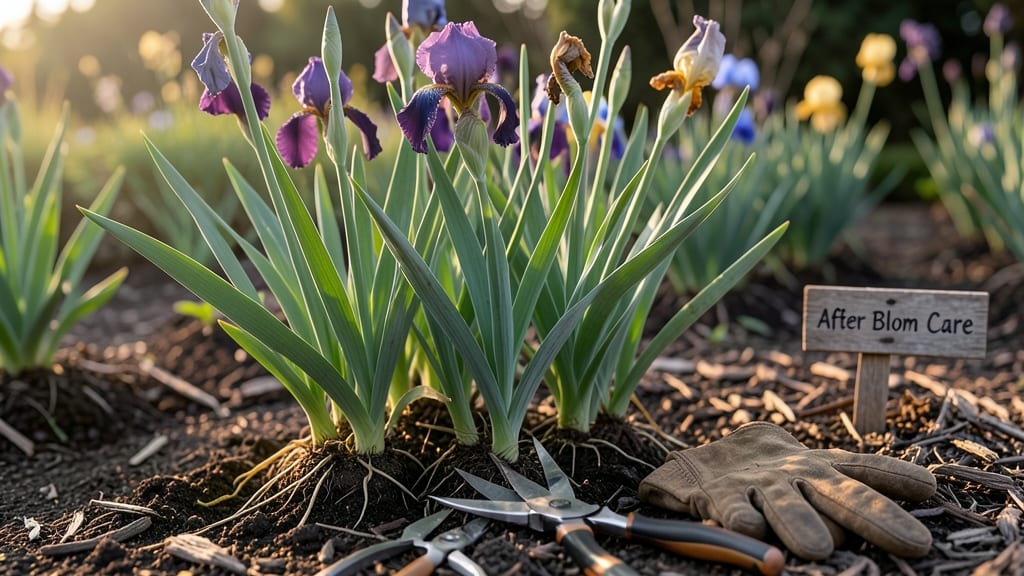
Your irises just put on a showstopping display, but the real work begins now—the after-bloom care is how you guarantee next year’s bold spikes. 🌿 The moment those dramatic blooms fade, your irises shift from "show-off" to "survival mode," and what you do in these weeks determines whether they’ll reward you with another extravagant performance.
I’ve watched clumps go from lush and productive to sad, sparse patches in just three years—until I learned the secrets of post-bloom care that keep rhizomes plump and roots hungry for growth.
The first rule? Never cut the foliage too soon—those strappy leaves are solar panels, feeding energy into the rhizomes for next season’s blooms. I’ve seen gardeners hack them off immediately, only to get half the flowers the following year.
Instead, wait until the leaves turn yellow and crispy, then trim them back to 6 inches. Pair that with a light feeding of low-nitrogen fertilizer (like 5-10-10) right after blooming, and you’ll see new shoots pushing through by early summer. The rhizomes need both time and nutrients to rebuild.
By mid-summer, your irises will be sending up fresh foliage—this is your cue to divide clumps if they’ve outgrown their space. I divide mine every 3-4 years, and it’s the single best way to revive tired patches.
Dig up the rhizomes, separate the smaller offshoots, and replant them with the tops exposed (never buried). The exposed part prevents rot and encourages strong new growth. With proper care, those divided rhizomes will bloom within a year, often producing even more dramatic spikes than the original plant.
Protecting them from summer heat is the final piece—mulch lightly with 2-3 inches of straw to keep moisture in and roots cool. I’ve lost irises to drought stress in July, but since I started this routine, my clumps thrive through the hottest months.
The key is consistency: water deeply once a week if rain’s scarce, and avoid heavy fertilizing after August. Your irises are already planning next spring’s show—now it’s your turn to give them the support they need.
📚 In This Guide
- What you need
- Instructions
- Tips and common mistakes
- Wrapping up and next steps
What you need
- ● Pruning shears or sharp garden scissors – Clean, sterilized (1 pair, 4–6" blades).
- ● Garden gloves – Heavy-duty, cut-resistant (1 pair).
- ● Compost or well-aged manure – 2–3 gallons per plant (organic matter).
- ● Balanced fertilizer (10-10-10 or 5-10-10) – 1–2 lbs per 10 sq ft (slow-release preferred).
- ● Mulch (straw, wood chips, or pine needles) – 2–3" layer (retains moisture, regulates temp).
- ● Watering can or hose with adjustable nozzle – Deep-watering capability.
- ○ Aluminum foil or cardboard – For protecting rhizomes from sunburn (optional but helpful in hot climates).
- ● Epsom salt (magnesium sulfate) – 1 tbsp per gallon of water (boosts bloom strength).
- ● Copper fungicide spray – Prevents rot/bacterial issues (1–2 sprays post-pruning).
- ● Soil moisture meter – Ensures rhizomes stay hydrated (not critical but handy).
- ● Plant stakes or labels – For tracking varieties (if you’ve got a mix!).
Step-by-Step instructions for reviving irises after bloom
Here’s how to nurse your irises back to strength so they’ll reward you with bold blooms next season.
🌱 Step 1: Cut Back Faded Blooms and Seed Pods
As soon as the iris blooms fade, snip the spent flower stalks at the base with clean shears. Don’t leave the pods—they drain energy from the rhizomes. I like to leave about 2-3 inches of stem below the bloom to avoid cutting into the rhizome itself. This prevents rot and keeps the plant focused on storing energy for next year’s growth.
Watch for seed pods forming—they’re the plant’s way of reproducing, but they’ll weaken your irises. If you’re not saving seeds, remove them promptly. You’ll know the blooms are fully spent when the petals turn brown and the stalks feel papery to the touch.
✂️ Step 2: Prune Yellow or Damaged Leaves
After the blooms are gone, assess the foliage. Remove any leaves that are yellow, brown, or mushy—these are signs of disease or stress. Use clean, sharp shears to cut them back to healthy green tissue. Never pull leaves by hand, as this can tear the rhizome or leave ragged edges that invite pests.
Leave about ⅓ of the fan of leaves intact—this ensures the rhizome still has enough energy to photosynthesize and rebuild. If you cut too much, the plant won’t store enough nutrients for next season’s spikes. I usually wait until late summer to do this, once the leaves start yellowing naturally.
☀️ Step 3: Water Deeply and Reduce Frequency
Once the blooms are gone, irises enter a semi-dormant phase. Water deeply once a week until the soil feels dry 2-3 inches down. This encourages the rhizomes to store moisture and nutrients for next year. Overwatering now leads to rot, especially in hot climates.
I know it seems counterintuitive, but irises thrive on neglect after blooming. If your area gets heavy rain, check the soil—it should never stay soggy. Let the leaves yellow naturally; this is the plant’s way of signaling it’s ready for dormancy.
🪴 Step 4: Apply a Light Mulch and Fertilizer
In late summer, spread a 1-inch layer of organic mulch around the base of the irises, keeping it 6 inches away from the rhizomes to prevent rot. I use shredded bark or straw—it keeps the soil cool and retains moisture without smothering the plants.
Now’s the time for a low-nitrogen fertilizer, like a 5-10-10 blend, to encourage root and rhizome growth without promoting leafy top growth. Apply it lightly, following package instructions, and water it in. This ensures the plant stores energy for next year’s blooms instead of just foliage.
⏰ Step 5: Monitor for Pests and Disease
Check irises monthly for signs of iris borers, which lay eggs in the leaf bases. Look for chewed holes or sawdust-like frass**—these are red flags. If you spot damage, remove affected leaves immediately and treat with neem oil or insecticidal soap.
I also watch for fungal spots on leaves—small purple or brown marks mean it’s time to act. Space out your plants if they’re crowded, as this improves airflow and prevents disease. Healthy irises should have firm, plump rhizomes and no signs of pests by late summer.
Tips & tricks for perfect iris revival after bloom
These simple strategies will help you transform post-bloom irises into next year's showstoppers.
Timing is Everything: Don't wait until the leaves start yellowing to prune—act as soon as blooms fade. I've learned the hard way that leaving spent blooms and seed pods too long drains the rhizomes' stored energy. The key is to remove them immediately after petals turn brown and stalks feel papery. This ensures your irises focus all their energy on rebuilding for next season's spectacular spikes.
Pruning Precision: When cutting back damaged leaves in Step 2, always use clean, sharp shears to make clean cuts at the base. I can't stress enough how important this is—ragged cuts invite pests and disease. Leave that ⅓ of the fan intact, even if it looks less than perfect. Those leaves are working hard to photosynthesize and store energy for future blooms, so don't cut them short.
Watering Wisdom: That once-a-week watering guideline in Step 3 can be tricky in different climates. In hot, dry areas, you might need to water every 5-6 days instead. The real test is checking soil moisture—stick your finger 2-3 inches down. If it feels dry, water deeply; if it's still moist, wait. Overwatering at this stage is the #1 cause of rhizome rot, so err on the side of less water rather than more.
Mulch Magic: When applying that 1-inch layer of organic mulch in Step 4, keep it 6 inches away from the rhizomes to prevent rot. I've found that straw works better than wood chips for irises because it breaks down more slowly and maintains consistent moisture. Apply it after you've fertilized, then water lightly to settle everything in place. This creates the perfect microclimate for your irises to recover.
Pro Tips for Irises After Bloom Care
- These simple strategies will help you transform post-bloom irises into next year's showstoppers.
- Timing is Everything: Don't wait until the leaves start yellowing to prune—act as soon as blooms fade. I've learned t...
- Pruning Precision: When cutting back damaged leaves in Step 2, always use clean, sharp shears to make clean cuts at t...
Frequently asked questions
Got questions about keeping your irises thriving after their showstopping bloom? Here’s what you’ve been wondering—plus easy fixes for common hiccups!
What should I do with iris leaves after the flowers fade?
Leave the fan-shaped leaves intact—they power next year’s blooms! Only trim dead or brown leaves (cut at the base) or flowers that have faded. Avoid cutting healthy foliage, as it stores energy for future growth. Pro tip: If your irises are in a pot, reduce watering slightly to prevent rot.
When is the best time to divide irises after blooming?
Wait until late summer or early fall (6–8 weeks post-bloom) to divide rhizomes. This timing lets them rebuild roots before winter. Dig carefully, separate clumps with at least one fan of leaves per division, and replant in well-draining soil. Skip division if your irises are less than 3–4 years old!
Why did my irises bloom but not rebloom the next year?
Common culprits: overcrowding (too many rhizomes competing), poor drainage (root rot), or lack of sunlight (6+ hours daily is ideal). Check soil moisture—irises hate soggy roots! If blooms were sparse, fertilize lightly with low-nitrogen, high-phosphorus food in early spring.
Can I cut back iris foliage after blooming for a cleaner look?
Yes, but wait until leaves turn yellow (late summer/fall). Cut back only the dead foliage—never healthy leaves! For a tidy garden, trim spent flower stalks right after blooming (they won’t regrow anyway). Avoid heavy pruning mid-season, as it weakens the plant.
How do I protect irises from heat stress after blooming?
Irises are drought-tolerant but thrive with consistent moisture during heatwaves. Mulch around the base (2–3 inches) to retain moisture and cool roots. Water deeply but infrequently (1–2 inches per week), avoiding wetting the leaves to prevent fungal issues. Morning watering is best—it reduces evaporation.
| Quick Fix | Problem |
|---|---|
| Divide rhizomes | No blooms or sparse flowers |
| Improve drainage | Yellowing leaves or mushy rhizomes |
| Fertilize (low-nitrogen) | Weak growth or small blooms |
| Prune dead leaves | Messy appearance post-bloom |
Wrapping up and next steps
Caring for irises after they bloom is all about giving them the rest and nourishment they need to roar back stronger next season. 🌱 With the right balance of pruning, mulching, and soil care, your irises will reward you with even more dramatic spikes of color—no magic required! Now that you’re armed with the know-how, take the next step: mark your calendar to inspect your plants in late summer, and watch as your garden transforms into a breathtaking iris paradise!