
Blooming
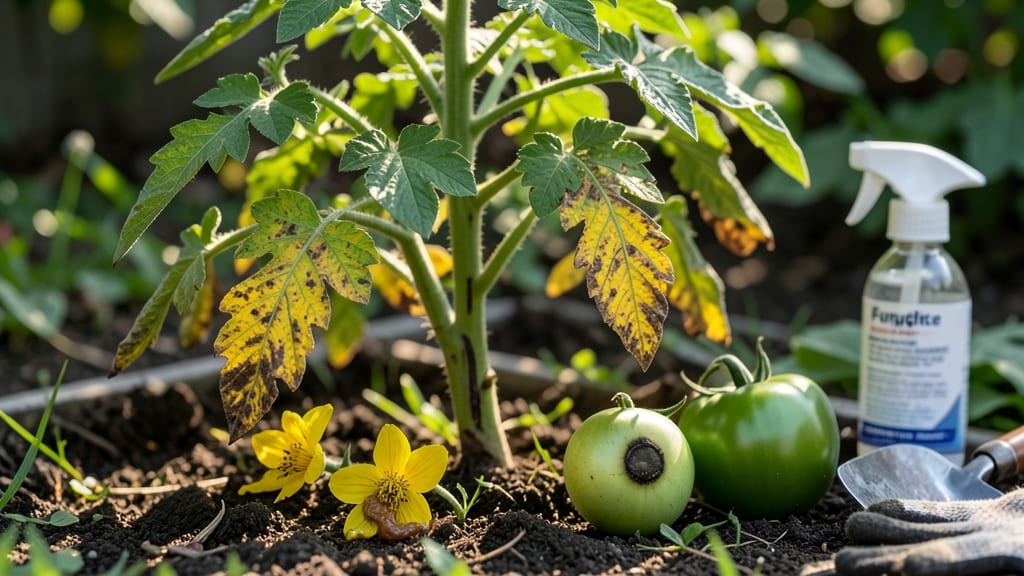
Your tomatoes are showing dark, sunken spots where they should be plump and red—this is bloom rot, and it’s stealing your harvest before it even ripens. 🌱 I’ve lost entire batches to this sneaky problem, but I’ve also learned the simple shifts that turn my plants into rot-resistant powerhouses.
The fix isn’t complicated: it’s about calcium, water consistency, and a few smart garden habits.
Most people blame bad luck when bloom rot strikes, but it’s actually a calcium deficiency triggered by uneven watering or soil stress. The dark spots start at the blossom end and spread—leaving you with misshapen, inedible fruit.
The good news? You can prevent it by amending your soil with crushed eggshells or lime, mulching to keep moisture steady, and watering deeply but consistently.
Once you spot the first signs, act fast: remove affected fruit immediately to stop the spread, and give your plants a calcium boost with a foliar spray or side-dressing of gypsum.
Within weeks, your tomatoes will start forming firm, healthy fruit again—no more wasted harvests. The key is catching it early and adjusting your routine.
This method works for both garden beds and containers, and it’s just as effective for heirlooms as it is for hybrids. The secret is patience and consistency—your future tomato harvests will thank you. Let’s get those plants back on track!
Root Causes Of Tomato Blight
When your tomato plants develop bloom rot, it’s not just bad luck—it’s usually a mix of environmental stress and poor growing conditions. Understanding the why behind this frustrating issue is the first step to stopping it before it ruins your harvest.
Let’s break down the key culprits, backed by science, so you can tackle them head-on.
Tomato flowers thrive in consistent warmth (70–85°F during the day, 55–65°F at night). But when temperatures skyrocket above 90°F—especially during flowering—pollination fails, and flowers drop without setting fruit. Even worse, rapid temperature shifts (like scorching days followed by chilly nights) confuse the plant’s reproductive cycle.
Here’s the science: High heat disrupts pollen viability, preventing it from fertilizing the ovules. Without fertilization, flowers wither, and any tiny fruits that do form often develop blossom-end rot (a related but distinct issue caused by calcium deficiency).
Actionable fix:
- 🌿 Provide shade cloth (30–50% coverage) during peak heat to keep temps below 90°F.
- 💡 Use reflective mulch (like white plastic or aluminum foil) to bounce heat away from plants.
- 🌱 Water deeply in the morning to cool the soil and stabilize temperatures.
Tomatoes are thirsty but hate soggy roots. When soil moisture fluctuates wildly—whether from drought or overwatering—the plant’s ability to transport nutrients (especially calcium) grinds to a halt. This leads to blossom-end rot in developing fruits and dropped flowers due to stress.
The problem? Calcium deficiency (often confused with bloom rot) occurs when water stress blocks calcium uptake in the roots. But bloom rot itself is triggered by poor pollination + heat stress, not just calcium.
Think of it as a two-part failure: No fruit forms (pollination issue) + existing fruit rots (calcium issue).
Actionable fix:
- 💧 Maintain even moisture—aim for 1–1.5 inches of water per week, delivered at the base (not the leaves).
- 🌱 Mulch heavily (2–3 inches of straw or wood chips) to retain soil moisture and prevent swings.
- 🔄 Avoid wetting flowers (water in the morning to let foliage dry before nightfall).
Tomatoes love fresh air. When plants are crowded or humidity spikes (especially at night), two problems arise:
- Pollination fails: Bees and other pollinators avoid damp, sticky flowers, leading to empty blossoms.
- Fungal pressure builds: High humidity encourages Alternaria or Botrytis (gray mold), which can mimic bloom rot by causing dark, mushy spots on flowers and fruit.
Humidity above 70% for prolonged periods also weakens cell walls in tomato flowers, making them more prone to dropping or rotting before fruit sets.
Actionable fix:
- 🌿 Space plants 18–24 inches apart (or use trellises for vertical growth).
- 💨 Improve airflow with fans (even a gentle breeze helps) or prune lower leaves to reduce humidity near the fruit.
- 🌞 Water early in the day so foliage dries before evening.
While bloom rot isn’t directly caused by nutrient deficiencies, imbalanced soil weakens plants, making them more susceptible to heat and water stress. Key offenders:
| Nutrient | Effect on Tomatoes | Fix |
|---|---|---|
| ⚖️ Too much nitrogen | Promotes leafy growth at the expense of flowers/fruit. Weakens plant’s ability to handle stress. | Switch to a balanced fertilizer (10-10-10 or 5-10-10) and side-dress with phosphorus-rich compost. |
| 🧂 Low calcium | Even if bloom rot isn’t calcium-related, blossom-end rot (a common companion) thrives in calcium-deficient soil. | Apply crushed eggshells, gypsum, or calcium nitrate at planting and mid-season. |
| 🌍 Compacted or waterlogged soil | Roots can’t absorb water/nutrients efficiently, leading to stress and poor pollination. | Amend soil with compost or perlite and ensure proper drainage. |
Pro tip: 💡 Test your soil before planting—many bloom rot issues stem from underlying soil problems that go unnoticed until flowers start dropping!
Tomatoes are self-pollinating, but they rely on wind, bees, or gentle shaking to transfer pollen. When pollinators are scarce (due to pesticide use, lack of flowers, or urban gardens), flowers may not set fruit at all.
Even worse, hand-pollination mistakes (like brushing flowers too roughly) can damage delicate stamens, reducing pollen transfer. Without successful pollination, no fruit forms—and what little does appear often rots quickly due to poor development.
Actionable fix:
- 🐝 Attract pollinators with native flowers (like marigolds, borage, or basil) near your tomato plants.
- 🤲 Hand-pollinate gently: Use a soft paintbrush or cotton swab to transfer pollen from stamen to pistil in the morning (when flowers are open).
- ⚡ Give plants a shake (literally!) on calm days to help wind pollination.
Fixing Tomato Blight Before It Ruins Your Crop
If you’ve spotted those telltale signs—white mold, shriveled blossoms, or fruit that never quite forms—don’t panic. Bloom rot (or blossom-end rot) in tomatoes is fixable, and with the right steps, you can salvage your plants and even prevent future outbreaks.
Below, we break down the most common causes and their practical fixes, so you can get back to growing juicy, healthy tomatoes.
Overwatering or soggy soil is a top cause of bloom rot, especially in containers or heavy clay soils. When roots struggle, they can’t absorb calcium—leading to those ugly dark spots on your tomatoes.
🔥 Step 1: Adjust Your Watering Routine
- Water deeply but less often. Instead of daily light sprinkles, give your plants 1–1.5 inches of water per week (more in extreme heat). Use a drip irrigation system or soaker hose to deliver water straight to the roots.
- Avoid wetting the leaves. Fungal spores love damp foliage—water at the base of the plant in the morning so the soil has time to dry.
👨🍳 Step 2: Improve Soil Drainage
- Amend heavy clay soil. Mix in compost, perlite, or coarse sand to create air pockets. Aim for soil that drains within 2–4 hours after watering.
- Raise containers. If growing in pots, elevate them with feet or bricks to prevent water pooling at the bottom.
- Check for compaction. Gently loosen soil around the roots with a fork if it feels hard or waterlogged.
💡 Pro Tip: Mulch Like a Pro
Spread 2–3 inches of organic mulch (straw, wood chips, or shredded leaves) around the base of your plants. This keeps soil moist evenly (no more surface crusting) and deters weeds that compete for water.
Tomatoes need calcium to develop strong cell walls—without it, fruit rots from the blossom end. Even well-drained soil can lack calcium if your plants are thirsty or overworked.
🍳 Step 1: Feed with Calcium-Rich Amendments
- Crushed eggshells. Rinse and dry eggshells, then grind them into a fine powder. Work 1–2 tablespoons per plant into the top inch of soil every 2–3 weeks.
- Lime (sparingly). For acidic soil, sprinkle dolomitic lime (follow package rates) and water it in. Test your soil first! Too much lime can harm plants.
- Calcium supplements. Use a liquid calcium nitrate (follow label instructions) or mix 1 tablespoon of gypsum per gallon of water and apply as a soil drench.
🎯 Step 2: Keep Soil Moist (But Not Soggy)
Calcium moves through water in the soil—so consistent moisture is key. Use a moisture meter or stick your finger in the soil: it should feel like a wrung-out sponge.
If bloom rot is paired with white fuzzy mold (like cotton), you’re dealing with a fungal infection—often Botrytis cinerea. This thrives in humid, crowded conditions.
⏰ Step 1: Prune and Space Plants Properly
- Remove infected blossoms and leaves. Snip off any moldy growth with clean pruners and dispose of it in the trash (not compost).
- Thin out foliage. Ensure 3–4 inches of airflow between plants. Crowded vines trap humidity and spread spores.
- Stake or cage tomatoes. Avoid overhead watering, which splashes spores onto leaves.
🔪 Step 2: Apply Fungicidal Sprays
- Baking soda spray. Mix 1 teaspoon baking soda + 1 teaspoon vegetable oil + 1 teaspoon mild soap per quart of water. Spray undersides of leaves every 7–10 days.
- Copper fungicide. Use a ready-made copper solution (like Bordeaux mixture) as directed. Reapply after rain.
- Neem oil. A natural fungicide and insect repellent. Spray in the evening to avoid harming bees.
✨ Pro Tip: Prevent Future Outbreaks
Rotate crops yearly—never plant tomatoes, peppers, or eggplants in the same spot two years in a row. Fungal spores linger in the soil!
Once you’ve treated the current issue, set your garden up for success with these habits:
- Test your soil. A pH test kit (ideal range: 6.0–6.8) ensures calcium is available.
- Choose resistant varieties. Try ‘Mountain Merit,’ ‘Celebrity,’ or ‘Roma’—they’re bred for disease resistance.
- Plant at the right time. Wait until soil is at least 60°F before transplanting seedlings. Cold stress weakens plants.
- Harvest regularly. Overripe tomatoes on the vine attract pests and fungi. Pick them when firm but ripe.
With these fixes, your tomato plants should bounce back—and next season, you’ll be the envy of the neighborhood with plump, rot-free fruit. 🍅✨
Frequently asked questions
How can I tell if my tomato plants have bloom rot versus blossom-end rot?
Bloom rot shows as white mold on flowers or shriveled blossoms that never form fruit, while blossom-end rot appears as dark, sunken spots on the bottom of tomatoes. The key difference: bloom rot prevents fruit from developing at all, while blossom-end rot affects existing fruit due to calcium deficiency.
Will removing affected blossoms stop bloom rot from spreading?
Yes! Prune off any moldy flowers or tiny fruits immediately to prevent fungal spores from spreading. Dispose of them in the trash (not compost) and apply a fungicide spray like neem oil or baking soda solution to protect remaining blossoms.
Can I still save tomatoes that already show blossom-end rot?
Unfortunately, fruit with blossom-end rot won't recover, but you can still harvest smaller, unaffected tomatoes. The key is preventing new cases by improving calcium levels and watering consistency. Remove all rotten fruit immediately to stop the spread.
How often should I apply calcium supplements to prevent these issues?
Apply calcium amendments like crushed eggshells or gypsum every 2–3 weeks during the growing season. For severe deficiencies, use a liquid calcium nitrate fertilizer every 7–10 days. Always water deeply after application to help roots absorb the calcium.
Are there tomato varieties that naturally resist bloom rot?
Some varieties like 'Mountain Merit' or 'Celebrity' show better resistance to both bloom rot and blossom-end rot. These hybrids often handle stress better, but no variety is completely immune—proper care remains essential for preventing issues.