
Blooming
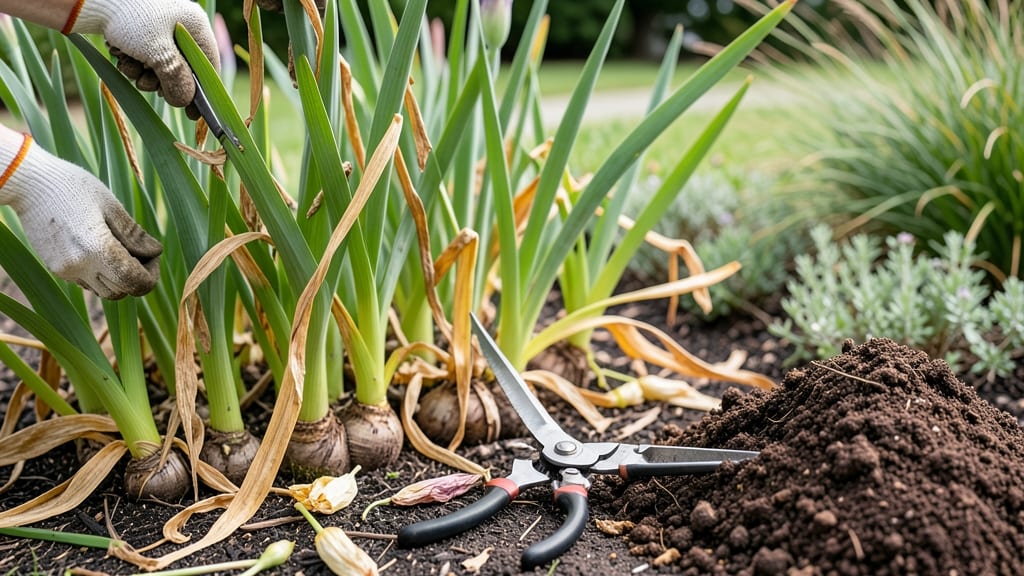
After iris bloom, then what? The real work starts now—proper care keeps them thriving for years, not just one spectacular season. ✨ The moment those flowers fade, your to-do list changes from admiring blooms to strategic pruning and feeding.
First, snip off those spent flower stalks at the base, but leave the fan-shaped leaves alone—they’re the plant’s energy factories. Then, if your clumps are getting crowded (usually every 3-5 years), it’s time to divide them in late summer.
The key is timing: wait until after blooming but before new growth slows in heat.
Feed them lightly with a balanced fertilizer or compost in early summer, and watch as next year’s blooms come back even stronger. Healthy irises reward patience with those iconic spikes year after year, and the secret is in the aftercare.
Whether you’re dealing with bearded, Siberian, or Louisiana irises, the same rules apply. The difference between a plant that fades and one that flourishes comes down to these simple steps—no guesswork, just consistent care.
📚 In This Guide
- What you need
- Instructions
- Tips and common mistakes
- Wrapping up and next steps
What you need
- ● Pruning shears – Sharp, clean, and bypass-style (avoid anvil shears—they crush stems). (1 pair)
- ● Gloves – Heavy-duty gardening gloves (to protect against thorns and dirt). (1 pair)
- ● Disinfectant – Rubbing alcohol (70%+ isopropyl) or bleach solution (1 part bleach to 9 parts water) (to sterilize tools and prevent disease). (small bottle or spray)
- ○ Garden twine or plant ties – Optional but helpful for supporting tall irises if needed. (1-2 rolls)
- ○ Compost or mulch – For enriching soil post-pruning (optional but recommended). (2-3 gallons)
- ● Hand pruners – For smaller cuts or tight spaces.
- ● Knee pads – If your irises are in a large bed (comfort is key!)
- ● Plant food – Balanced, low-nitrogen fertilizer (like 10-10-10) to boost regrowth.
- ● Spray bottle with water – To mist cuts and encourage healing.
Step-by-Step iris care after the blooms fade
Here’s how to keep your irises thriving after those stunning purple spikes say goodbye.
🌿 Step 1: Wait Until Flowers Fully Fade
Don’t rush to prune—let the blooms wilt naturally on the stems. This process feeds energy back into the rhizomes, strengthening next year’s growth. You’ll know it’s time when the flower stalks turn completely brown, typically 4-6 weeks after blooming. Cutting too soon removes nutrients the plant needs.
I like to wait until the stalks feel dry and papery to the touch. If you’re unsure, gently tug on a stalk—if it pulls away easily, it’s ready. This patience pays off with bigger, healthier blooms next season.
✂️ Step 2: Trim Stems to the Ground
Once the flower stalks are completely brown, use clean, sharp pruners to cut them back to the ground. This prevents disease and keeps the garden tidy. Avoid leaving stubs—cut all the way down to the base of the rhizome. I use sterilized pruners to avoid spreading fungal spores between plants.
Don’t worry about the leaves yet. They’ll stay green and continue feeding the rhizome until late summer or early fall. The key is to remove only the dead flower stalks now. If you accidentally cut any green foliage, don’t stress—irises are tough and will recover.
💧 Step 3: Fertilize and Water Deeply
After pruning, give your irises a boost with a balanced, low-nitrogen fertilizer. I use a 5-10-10 formula in early summer to encourage strong root growth. Apply it lightly around the base of the plant, keeping it 3-4 inches away from the rhizomes to avoid burning them.
Water deeply after fertilizing to help the nutrients soak into the soil. Irises prefer well-draining soil, so avoid soggy conditions. You’ll see new leaf growth within 2-3 weeks—this is your sign that the plant is storing energy for next year’s blooms.
🌱 Step 4: Divide and Replant if Needed
Every 3-5 years, irises need dividing to prevent overcrowding. Wait until the foliage turns yellow in late summer or early fall. Gently dig up the rhizomes, separating any that have grown more than 12 inches apart. Discard the oldest, woody rhizomes—they won’t rebloom well.
Replant the healthiest rhizomes in a sunny spot with full sun exposure. Bury them shallowly—just an inch or two below the soil surface—with the fan of leaves pointing upward**. Water lightly after planting, and they’ll establish roots before winter.
☀️ Step 5: Prepare for Winter Dormancy
As fall approaches, reduce watering but keep the soil slightly moist. Irises need to enter dormancy gradually. Once the foliage turns yellow and dies back naturally, stop watering entirely. Mulch lightly with 2-3 inches of straw or leaves to protect the rhizomes from freezing temperatures.
In early spring, remove the mulch and watch for new shoots. This is when the cycle begins again, and your irises will reward you with those iconic purple spikes. The care you put in now ensures they’ll bloom beautifully for years to come.
Tips & tricks for perfect iris post-bloom care
These simple strategies will help you avoid common mistakes and maximize next year's iris blooms.
Timing is Everything: The 4-6 week waiting period after blooming is crucial—don't skip it! I've seen gardeners rush this step and end up with weak rhizomes that produce fewer flowers. Mark your calendar when the first blooms appear to track the 4-6 week timeline. If you're in a hot climate, you might need to extend this slightly since heat accelerates drying. The dry, papery feel is your best indicator, not just time.
Pruning Precision: When you finally trim those brown stalks in Step 2, cut cleanly at the base—no stubs allowed. I use sterilized pruners and wipe them with rubbing alcohol between cuts to prevent spreading fungal spores. This might seem like overkill, but I've seen iris beds develop mold when pruners weren't properly cleaned. The clean cut also makes future care easier and looks more professional in your garden.
Fertilizer Placement: That 5-10-10 formula in Step 3 needs to go in the right spot—3-4 inches away from the rhizomes. I've made the mistake of applying it too close and ended up with brown patches where the fertilizer burned the rhizomes. Think of it like applying sunscreen—you want it nearby but not directly on the skin. After applying, water deeply to help the nutrients reach the roots.
Dividing Strategy: When you're dividing rhizomes in Step 4, focus on the healthiest ones—the largest, firm rhizomes with good root systems. I discard any that look shriveled or have black spots, as these won't produce strong blooms. The 12-inch separation rule is your guide, but don't be afraid to split even closer if you're replanting a crowded bed. Just make sure each new planting has at least one healthy rhizome with roots attached.
Pro Tips for After Iris Bloom Then What
- These simple strategies will help you avoid common mistakes and maximize next year's iris blooms.
- Timing is Everything: The 4-6 week waiting period after blooming is crucial—don't skip it! I've seen gardeners rush t...
- Pruning Precision: When you finally trim those brown stalks in Step 2, cut cleanly at the base—no stubs allowed. I us...
Frequently asked questions
Got questions about what to do after your iris blooms?
Here are the most common ones—plus clear, actionable answers to keep your irises thriving for years to come!
What should I do with iris stems after they bloom?
Once your irises finish blooming, don’t cut the foliage back right away! Let the leaves die back naturally over 6–8 weeks. This helps the plant store energy for next year’s blooms. Only trim dead or yellowed leaves in late summer or early fall.
How long after blooming can I prune iris leaves?
Wait until after the leaves turn brown and crispy—usually 6–8 weeks post-bloom. Pruning too soon removes nutrients the plant needs. If you’re in a hot climate, you might trim earlier (late summer), but avoid cutting before mid-July to avoid stunting next year’s growth.
Can I cut iris flowers off to encourage more blooms?
Yes! Deadheading spent blooms (removing the flower stalk) can redirect energy to the roots and sometimes encourage a second, smaller flush of blooms. Just leave the leaves intact. For bearded irises, cut the stalk below the first leaf node to avoid damaging the plant.
What if my iris leaves turn yellow after blooming?
Yellowing leaves after blooming are usually normal, but if they’re mushy or covered in spots, it could signal rot or disease. Trim affected leaves immediately, improve drainage, and avoid overhead watering. If the whole plant looks weak, it might need division or fertilizer (low-nitrogen, high-phosphorus).
Should I divide my irises after they bloom?
Dividing is best done after blooming but before the foliage dies back completely (late summer). Wait until the leaves yellow slightly—this signals the plant is storing energy. Dig up clumps every 3–4 years to prevent overcrowding, which can reduce blooms. Replant rhizomes at the soil level, not buried!
Wrapping up and next steps
Pruning your iris after its stunning purple bloom isn’t just about tidying up—it’s your secret to vibrant, long-lasting blooms year after year! By following the right steps, you’ll encourage stronger roots, prevent congestion, and keep those iconic spikes thriving.
Now that you’re armed with the know-how, grab those shears and get pruning—your iris garden will thank you with bold, healthy growth next season!
🌱 Next Step: Mark your calendar for late summer or early fall to divide and replant if needed—it’s the perfect time to refresh your clumps and boost future blooms! 💜